Besides reviewing the frame, I feel compelled to add a note about the creator of the frame: Lane Kagay. I purchased a small front rack for another bike a few years ago when his racks were one of the few options available. After paying via google checkout, it arrived a while later. I don't remember exactly how long it took, but I do remember that he never sent an email with an ETA or saying that it had been shipped. I was just about to contact him to check on its status when it arrived.
When I was first researching baby-friendly bikes, I contacted Lane to get a quote and it took him 6 months to reply to the initial email (he said it got lost in his inbox among various inquiries). Given this, and my previous experience with his lack of communication, I should have looked elsewhere. Omitting most of the details, I will say that he lacks any kind of professionalism one would expect when paying $2000 for fabricated equipment. There were numerous delays, and Lane always put the blame elsewhere. It ended up taking twice as long (3 months instead of 6 weeks) as it was supposed to and only arrived after I disputed the Paypal charge (which froze his Paypal account and motivated him to get his act together).
The Frame/fork:
The pieces consist of: front fork, rear half of frame (similar to the rear triangle of a regular bike), front half of frame (including cargo area), rear steering column (where handlebars are attached), steering linkage (which goes under cargo area), bolted on super wide kickstand, seatpost shim allowing one to use a standard 27.2mm seatpost, and two steering column clamps (one for front fork, and one for rear steerer tube), cargo platform consisting of plywood covered with weather/slip resistant coating, and eccentric bottom bracket insert.
Assembly
The installation of the rear steerer tube and associated headset was a little tricky since the tube is too long to use a traditional headset press. After assembling the bike and riding it, I found the steering difficult and found that the inside of the rear headtube had some excess metal from welding that was interfering with the steerer tube turning freely. I had to remove the headset cups and ream the rear headtube which solved the problem (I'm glad I worked at a bike shop at the time).
I also found that the rear dropout spacing was 130mm, which seems an odd choice for a cargo bike. Most people will probably be using heavy duty mountain bike components which use 135mm spacing. Since the rear dropouts are so thick and well braced, it makes installing any hub that is wider than 130mm very difficult. Normally, this wouldn't be such an issue on a steel frame. The rear end could simply be bent slightly to make the spacing appropriate, but the heavy duty reinforcement makes this virtually impossible.
Cargo hauling
I found the cargo area to be one of the more versatile of all the cargo bikes I looked at. There are plenty of attachment points for bungees and straps.


Carrying cargo like this would be a lot more difficult to do with a Bakfiets.nl cargo bike
The cargo platform can be removed and custom pieces attached to the mounting points normally used for attaching the platform. I had planned to make a rack to hold multiple bikes in the cargo area, but ran out of time between the arrival of the bike and the arrival of Oscar.
I have carried adults and other heavy loads on a couple occasions and find the handling to be less than ideal for loads over 150 lbs. It is serviceable, but I would be reluctant to carry that much weight on a regular basis or in areas which require precise maneuvering.
Edit: on at least one occasion, I've forgotten to increase the inflation on my tires when hauling heavy stuff, and this causes some of the poor handling. I have a very high volume 20"x2.3" front tire that I usually keep at 25psi to smooth out rough roads for Oscar, but this inflation is too low for heavier loads.
Edit: on at least one occasion, I've forgotten to increase the inflation on my tires when hauling heavy stuff, and this causes some of the poor handling. I have a very high volume 20"x2.3" front tire that I usually keep at 25psi to smooth out rough roads for Oscar, but this inflation is too low for heavier loads.
Other considerations
The only other complaint that causes me consistent irritation is the extremely wide rear end. The frame tubes which brace the rear dropouts flare out considerably, forcing me to use cranks and a bottom bracket that place the pedals extremely far apart (this is called the Q factor or Tread). I realize that this is probably nitpicking to most people, but the pedals are far enough apart to make pedaling uphill noticeably less comfortable than on my other bikes.

The outside of the crankarms are about 165mm apart (the Q Factor), many frames that can fit wider tires can accommodate a narrow tread of around 150mm. The outside of the frame tubes are about 5 inches apart. There is plenty of clearance for the tire (a 2" wide tire), enough that the frame tubes could me moved in 1/2" on each side and still have room for a 2.3" wide tire. (Update: I have seen more recent Cetma frames where the chainstays are a little closer together, rendering this not as much of an issue).
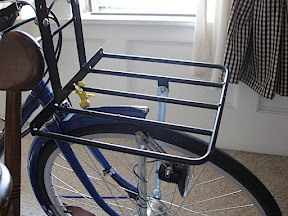
The mounting points for the rear rack are also a little clumsy. But to be fair, there are very few bikes with disc brakes where the rear rack attaches easily since the caliper is often in the way of the rack strut (there are disc-specific racks that basically have a L-joint to clear the caliper, but this cantilevers the weight away from the mounting point--not ideal). On the other hand, I feel that this being a cargo bike a rear rack would be an obvious accessory and since the frame is custom-made it shouldn't have added that much work to make a rack mount that was more accessible. This is another case where roller or drum brakes would have made things easier since the brakes don't get in the way of the rack struts.
Component considerations:
It can be a little tricky choosing components for a cargo bike. Most bike shops don't have a lot of experience with them and many heavy duty components that come on European cargo bikes aren't available in the United States.
Brakes: For flat terrain the ideal brakes would be roller or drum brakes. They stop consistently in all kinds of weather, they are well sealed from the elements and they don't require a finicky alignment between the frame and the wheel like disc brakes or rim brakes. The downside is they lack the braking power of rim or disc brakes. They would be ok on the smaller front wheel. Since the drum is large relative to the small wheel, the braking power is not as diminished as it would be on a larger diameter wheel.
There is also the matter of the distance from the lever to the caliper. With nearly 8 feet of cable, there is a lot of friction making the lever harder to pull and making a smooth application of increasing braking force impossible. The high performance Larry vs. Harry cargo bikes use hydraulic brakes which eliminate this problem. I opted to forgo this because of the increased cost and maintenance of hydraulic systems.
I use Avid BB7 calipers with 203mm rear rotor and 180mm front rotor. I would not use smaller rotors at all. I started with 160mm rotors and glazed the rear pads from going downhill while the bike was loaded, and the front brake was never very powerful due to cable drag. (Update: hydraulic brakes have become more reliable and more affordable in recent years, hydraulic brakes are a near necessity on cargo bikes now)
I use Avid BB7 calipers with 203mm rear rotor and 180mm front rotor. I would not use smaller rotors at all. I started with 160mm rotors and glazed the rear pads from going downhill while the bike was loaded, and the front brake was never very powerful due to cable drag. (Update: hydraulic brakes have become more reliable and more affordable in recent years, hydraulic brakes are a near necessity on cargo bikes now)
Verdict
There are a couple reasons you might choose a CETMA cargo bike over a bakfiets.nl bike. The primary reason is the customization. You can use derailleurs for especially hilly areas, disc brakes for tons of stopping power, or you can put custom-made attachments in the cargo area. If it is hilly enough to need derailleurs, you'll probably going to want electric assist as well. Even in mostly-flat DC the small hills can get tiresome quickly.
If you are primarily hauling children around, you'll want rain covers. There are rain covers that are made to fit the bakfiets.nl bikes. With a CETMA, you would either have to make the box the same dimensions as the bakfiets.nl bikes (which I did, and it wasn't easy) or you have to have someone custom make rain covers. Blaq designs in Portland can make rain covers to fit any box, and they seem to be an improvement over the bakfiets.nl design.
I would say that for most people a bakfiets.nl bike would be the way to go if there is a dealer within a reasonable distance (within driving distance of Seattle, NY, or Portland). Once you factor in things that are included in the bakfiets.nl bike (box, full chaincase, rear rack, dynamo lights), the CETMA bike is going to cost quite a bit more.
I didn't offer the Larry vs. Harry Bullitt as an alternative when I originally did this review. Partly because the frame is aluminum instead of the steel, the ride position is generally more aggressive (though customizable to some extent) and the cargo area is a bit smaller. Now that there are more Bullitt dealers in the US and more accessories available (with some dealers installing Bionx assists) the Bullitt is a good option for people who don't need the larger cargo area.
I didn't offer the Larry vs. Harry Bullitt as an alternative when I originally did this review. Partly because the frame is aluminum instead of the steel, the ride position is generally more aggressive (though customizable to some extent) and the cargo area is a bit smaller. Now that there are more Bullitt dealers in the US and more accessories available (with some dealers installing Bionx assists) the Bullitt is a good option for people who don't need the larger cargo area.
Update
I added an electric motor to the front wheel about one year ago. It is a 500W Bafang motor with a 36V 15Ah battery. It makes the bike handle much more like a regular bike. Normally, it takes quite a bit of effort to reach the speed at which the bike handles more like a regular bike. A motor allows me to get to this speed in 2-3 seconds. It makes such an unbelievable difference in how far I am willing to ride and the kind of hills that can be traversed and how tired I am after riding. I would highly recommend investing in an electric motor from the start for most kinds of terrain.
My commute home is all flat or uphill and about 5 miles. The motor allows to cut my commute nearly in half, from 45-50 minutes to 30 minutes. In part because I can keep up with traffic downtown and hit multiple green lights in a row, whereas without a motor I would have to stop at nearly every intersection.
After having the motor installed for 16 months and riding the bike for just over 4 years, it was hit by a dump truck while parked. The front wheel was destroyed and the frame buckled just behind the fork rendering it unrideable. I tried contacting Lane of Cetma so I could replace just the front half of the frame, but it has been a few weeks and he hasn't responded. I have moved on to a Yuba Spicy Curry, which I am loving so far.
After having the motor installed for 16 months and riding the bike for just over 4 years, it was hit by a dump truck while parked. The front wheel was destroyed and the frame buckled just behind the fork rendering it unrideable. I tried contacting Lane of Cetma so I could replace just the front half of the frame, but it has been a few weeks and he hasn't responded. I have moved on to a Yuba Spicy Curry, which I am loving so far.
8 comments:
Good to know, thanks. You want to support a small maker, but they've got to have their act together first.
Blaq designs makes raincovers for the cetma margo and largo. no problem there.
Lane also will custom weld a rear rack during production.
Thanks for the review. My wife and I are thinking of buying one of these bikes. How has the bike worked out for you over the last 2 years? We live in NOVA and I would love to test ride one of these bikes. If you are willing to let someone check out your bike please contact me at andrewlhartzell at hotmail
I'm in Baltimore and would be happy to offer my bike for test rides.
Can you comment more specifically about the steering? Is the steering linkage smooth and tight? I test rode a bike with linkage steering the other day and felt like that bike had some looseness/play in the steering that was like an old old car. How does the steering compare to a LvH Bullitt?
THanks.
Many people complain that the LvH Bullitt bikes are overly responsive, with a learning curve of a few weeks.
I found the CETMA to have a learning curve of a day or two. It has a heavy box on it, with the widest front tire I could find (2.3") so it steers like a large SUV. When riding at speed, I don't notice any sluggishness, but it is difficult to maneuver at low speeds or in tight spaces.
The is no noticeable play in the linkage when riding. If you push on the various parts by hand, there is some negligible play in the ball/socket joint near the front wheel. The rear part of the linkage uses brass bushings with a good fit.
I tried to buy one of his rack. Been in contact with him (I mean, I was in contact with him but the other way) from sept. 2015 and didn't get anything till now (Jan. 2016). I made my online transaction for it In October and I was supposed to have it delivered before Nov.,16. He just disappeared. Sent him emails, called him but no explanation. In December I wrote my last email saying that I would have claimed my money through PayPal and let the people in the web knows how he does his business. I got an answer with apologies and two promises: total refund and a free rack, with an email the next day with the shipping details to prove he was sorry. Well, I got my money but no email and no rack. So, before you start with him (if you are brave!), make sure he is not lying.
larry vs harry are great bikes, I got one in COpenhagen. perhaps they couldn;t ship it
Post a Comment